This blog post will be the second part of the Setup Azure AD B2C blog series. From this blog post, we will be able to set up identity providers and policies to the Azure B2C AD.
https://developers.facebook.com/apps/
Github
https://github.com/settings/developers
Linkedin
https://www.linkedin.com/developers/
Microsoft Account
https://portal.azure.com/
Google
https://console.developers.google.com/
Amazon
https://aws.amazon.com/cognito/


For this article, I will set up Sign up and sign in user flow. You can select the desired user flow.


Once user flow creates it will be listed in the User flows (policies) page. Click on the newly create user flow will redirect to its settings page. there you can change user flow settings as required.

Languages - You can configure your user flow to support multiple languages.


This will end the article setup identity providers and policies to the Azure B2C AD. Hope you learn something.
May the force be with you!
Identity providers
An identity provider (abbreviated IdP or IDP) is a system entity that creates, maintains, and manages identity information for principals while providing authentication services to relying applications within a federation or distributed networkAzure AD B2C - Identity providers
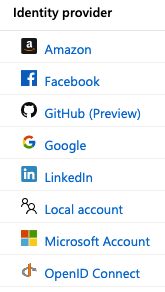
Azure supports many identities such as social, enterprise, or local account identities in B2C AAD. The following image shows some of the identity providers that currently B2C AAD support.
As you can see AAD B2C Supports numerous identity providers. Except for Local account every other identity provider, you have to configure manually.
Configure Social IDP
In order to use social identity providers, we need to configure them first. Different identity providers use different ways to configure IDP. So to give you a general idea I will list a set of steps that are common for most IDPs.- First, you need to find the IDP's developers portal. I have listed down some below,
https://developers.facebook.com/apps/
Github
https://github.com/settings/developers
https://www.linkedin.com/developers/
Microsoft Account
https://portal.azure.com/
https://console.developers.google.com/
Amazon
https://aws.amazon.com/cognito/
- Then, create a new app by providing the necessary information.
- Add Permissions, APIs or Products to your newly created app.
Your Permissions, APIs or Products should be related to the Login or Sign in.
 |
| Facebook Login Product |
 |
| Microsoft (Azure) Sign in API/Permission |
 |
| Linkedin Sign in Product |
- Copy newly created app's App Id and App Secret (If you don't have the Secret with you, probably you have to generate it)
- Navigate Azure AD B2C - Identity providers.

- Click on the desired IDP where a window will fade in from the left-hand side.

- Origin URL and Callback URL will be auto-filled but you have to give a friendly Name and paster those App Id and App Secret as Client ID and Client secret here.
Configure Custom IDP
If you are using OpenID Connect, you have to configure with more information.

Once all set we can now move to policies.
Azure AD B2C - User flows (policies)
After setting up identity policies. We need to add user flows (policies) for,
- Sign up and sign in
- Profile editing
- Password reset
Navigate to User flows (policies) page.

Top left corner you can find the New user flow button. Click on it.

For this article, I will set up Sign up and sign in user flow. You can select the desired user flow.

In the Create window, you need to fill out needful.
- Name - Name for the user flow. Mainly for reference purposes.
- Identity providers - Screen will list down all the configured IDPs including Email signup (Local account). Select what you need.
- Multifactor authentication - Sign up and sign in user flow support the second factor for verify identity.
- User attributes and claims - You can select attributes (values collected at the sing up) and claims (values about the user returned to the application in the token) needed.

Once user flow creates it will be listed in the User flows (policies) page. Click on the newly create user flow will redirect to its settings page. there you can change user flow settings as required.
Settings
- Properties - Multifactor authentication, Token lifetime, Token compatibility settings, Session behavior, and Password complexity properties can be changed from this section.
- Identity providers - Select or deselect IDPs
- User attributes - Select or deselect user attributes (user attributes are values collected on sign up).
- Application claims - Select or deselect Application claims (claims are values about the user returned to the application in the token).

Customize
Page layouts - THis page will list all the AAD B2C Sign up and sign in user flow pages. Select a page to customize its appearance. You can provide your own HTML and CSS to add your own branding and layout.Languages - You can configure your user flow to support multiple languages.

Applications
In order to consume AAD B2C Identity Service. All the consumers need to have an application register inside the directory. This application provides consumers below information,- Name of the consumer's application
- An identifier for the application
- Brief information about consumer's application
- Reply URLs for consumer's application
- Secret app keys consumer's application
- API access to consumer's application
Navigate to the Applications page. Then click on add at the top right corner.

Provide a name and the nature of the consumer's application

Once you create the application. Click on the newly created app, that will redirect to the app's properties page. There you can change above listed information.
Test user flow
When you are in this stage I hope you have a user flow that customized according to your requirement. We can run this and test newly created user flow.
Navigate to User flows (policies) page.
Click on Run user flow
Run user flow window will fade in from the left-hand side.

Select the newly created Application
Select https://jwt.ms as the reply URL
Select the desired domain and click on Run user flow
It will open a new page with Sign up and sign-in features like below,

This will end the article setup identity providers and policies to the Azure B2C AD. Hope you learn something.
May the force be with you!
Comments
Post a Comment